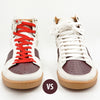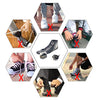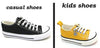

Are you tired of constantly bending down to tie your shoelaces? Do you wish there was a convenient and stylish alternative to traditional laces? Look no further! At Qlaces.com, we have the perfect solution for you - No Tie Shoelaces! Say goodbye to the hassle of tying knots and hello to the freedom and comfort of elastic shoelaces.
No Tie Shoelaces for Adults and Kids
No tie shoelaces are not just for kids, but also for adults who seek ease and efficiency in their daily footwear routines. Whether you are a busy professional, an athlete, or a parent on the go, our elastic shoe laces are designed to cater to all age groups. Our collection features a wide variety of colors, lengths, and styles, ensuring there's a perfect match for every shoe type, no matter your age or style preference.
Why Choose Elastic Shoelaces?
-
Convenience: The foremost advantage of using no tie shoelaces is the convenience they offer. Once installed, you'll never have to waste time tying and untying knots. Just slip your shoes on and off effortlessly, saving you valuable seconds in your busy schedule.
-
Comfort: Elastic shoe laces provide a snug fit without being too tight. They allow for natural foot movement and reduce pressure points, making your shoes more comfortable to wear, even for extended periods.
-
Safety: Untied shoelaces can pose a tripping hazard, especially for active kids and seniors. No tie shoelaces ensure a secure and tight fit, eliminating the risk of accidents due to loose laces.
-
Versatility: Whether you're into running, sports, or simply looking for a comfortable everyday option, no tie shoelaces are versatile enough to cater to all your needs. They can be used in sneakers, casual shoes, and even some formal footwear.
How to Use No Tie Shoelaces
Using no tie shoelaces is a breeze. Follow these simple steps to get started:
-
Lace Replacement: First, remove your old laces from the shoes. Then, insert the no tie shoelaces through the eyelets just like regular laces.
-
Adjust Length: If the elastic laces are too long for your shoes, trim them to the desired length using scissors. Don't worry; the laces won't fray or unravel.
-
Locking System: Most no tie shoelaces come with a locking system. Once you have adjusted the length, secure the laces by fastening the locks provided. This ensures a snug fit that won't come undone during wear.
-
Enjoy the Convenience: Congratulations! You've now successfully transformed your shoes into slip-ons. Enjoy the convenience and comfort of your new no tie shoelaces.
New Innovative Shoelaces
No tie shoelaces have revolutionized the way we wear shoes, making our lives easier and more efficient. Whether you're an adult looking to simplify your morning routine or a parent seeking a hassle-free option for your kids, elastic shoe laces are the way to go. At Qlaces.com, we offer a wide range of no tie shoelaces suitable for every age and style.
Don't let traditional laces hold you back. Embrace the freedom of no tie shoelaces and experience a new level of comfort and convenience in your daily life. Visit Qlaces.com today and step into a world of effortless style and functionality. Your shoes will thank you!